
How to Fix Sinking Stepping Stones in Rochester Minnesota
Stepping stones can add a practical and attractive path through a lawn, garden bed, or side yard, but over time they may begin to sink, tilt, rock, or collect water. In Rochester, Minnesota, this is especially common because seasonal freeze-thaw cycles, clay-heavy soils, drainage problems, and repeated foot traffic can gradually shift the material underneath the stones.
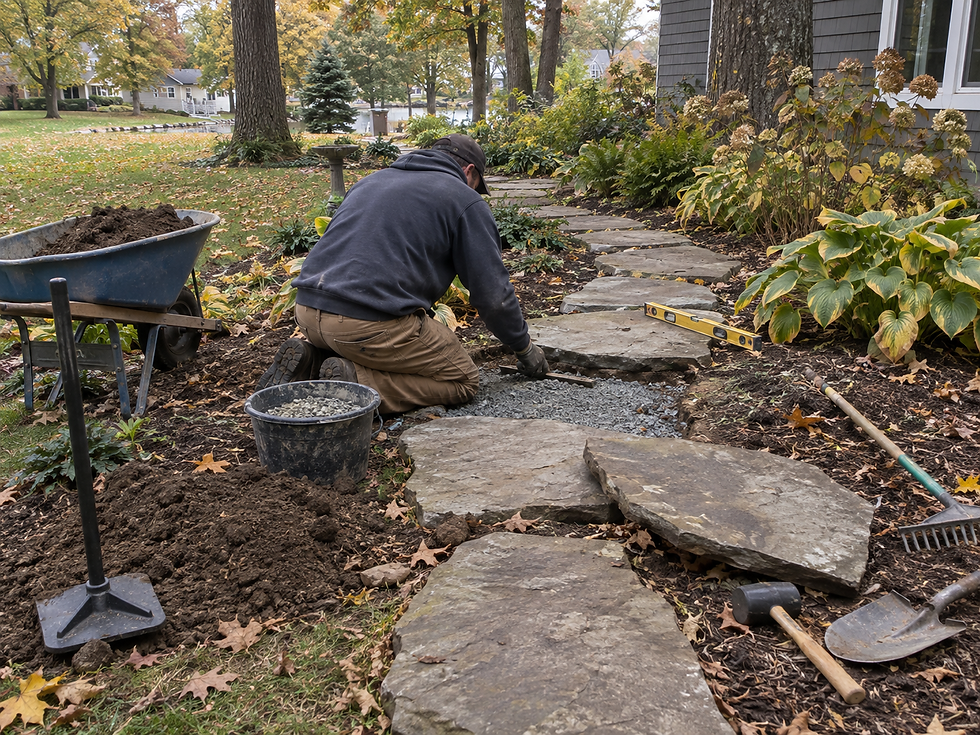
For homeowners researching how to fix sinking stepping stones in Rochester Minnesota, the most important step is correcting the base rather than simply adding soil around the edges. A proper repair usually involves lifting the stone, removing unstable material, rebuilding the base with compacted aggregate or leveling material, and resetting the stone at the correct height and slope.
When done correctly, repaired stepping stones should feel stable underfoot, drain properly, and stay aligned much longer.
How to Fix Sinking Stepping Stones in Rochester Minnesota
A typical stepping-stone repair involves:
Removing the sunken or uneven stone.
Excavating loose or washed-out material underneath.
Checking for drainage or soil problems.
Adding and compacting a stable base.
Adding a thin leveling layer.
Resetting the stone at the correct elevation.
Checking slope and spacing.
Filling and stabilizing surrounding edges.
Testing the stone for movement.
The most common mistake is simply lifting the stone and placing loose soil underneath it.
That may temporarily raise the stone, but ordinary topsoil compresses easily and can wash away. The problem often returns after rainfall or another winter.
Why Stepping Stones Sink in Rochester
Several conditions commonly contribute to sinking.
Freeze-Thaw Cycles
Rochester winters repeatedly freeze and thaw the ground.
Moisture in the soil expands when it freezes. When the soil thaws, it may settle unevenly.
Over several seasons, this movement can cause one side of a stone to rise while another drops.
Poor Base Preparation
A stepping stone installed directly on topsoil or loose fill often settles over time.
The base should be strong enough to distribute weight and resist movement.
Clay or Poorly Draining Soil
Heavy soil can hold water beneath the stone.
When that moisture freezes, the stone may heave. When the ground thaws, the softened soil may compress.
Water Runoff
Downspouts, slopes, or nearby hard surfaces can direct water toward the path.
Water moving under or around stones may wash away the supporting material.
Repeated Foot Traffic
Frequently used paths naturally receive more downward pressure.
If the base was not properly compacted, repeated use gradually pushes the stones lower.
Start by Removing the Stone Carefully
Lift the affected stone without damaging it.
For heavier natural-stone pieces, a pry bar or flat shovel may help loosen the edges.
Before removing it completely, note:
Existing height
Direction of slope
Relationship to neighboring stones
Whether water is pooling around it
How deep the stone has settled
If several stones are sinking in the same area, the issue may be more than a single bad base.
It could indicate drainage problems or settling across the entire path.
Excavate the Unstable Material
Once the stone is removed, dig out loose material underneath.
The amount of excavation depends on the size and thickness of the stone, but many repairs benefit from several inches of prepared base beneath the finished surface.
Remove:
Soft soil
Mud
Loose fill
Organic material
Roots where appropriate
Washed-out sand
Do not excavate unnecessarily deep, but make sure the repair reaches stable ground.
If the bottom remains soft and wet, investigate drainage before rebuilding the base.
Build a Stable Aggregate Base
A compacted crushed-stone base is usually more reliable than ordinary soil.
Common base materials may include:
Crushed limestone
Class 5 aggregate
Crushed gravel
Compactable base material
The aggregate should be added in thin layers and compacted.
For many residential stepping-stone repairs, a 2- to 4-inch compacted base may be appropriate, depending on soil conditions and expected traffic.
Heavier stones or unstable soils may need more.
Compact the material using:
Hand tamper
Plate compactor
Mechanical compaction equipment for larger areas
The goal is a firm platform that does not shift when stepped on.
Add a Thin Leveling Layer
Once the base is compacted, add a thin leveling material.
This may include:
Bedding sand
Fine crushed stone
Stone screenings
The leveling layer allows small height adjustments.
It should not be several inches thick. Thick loose bedding can settle just like soil.
Use only enough material to create full contact between the stone and the compacted base.
Reset the Stepping Stone
Place the stone back into position and check its height.
The finished stone should typically sit:
Flush with the surrounding lawn
Slightly above soil in a garden bed
Even with neighboring stones
If stones are installed through turf, setting them too high can interfere with mowing.
Setting them too low creates a depression where water, mulch, or soil can collect.
Use a rubber mallet if needed to gently settle the stone into the leveling layer.
Avoid striking natural stone aggressively because it can crack.
Check for Rocking
Stand on the stone and shift your weight slightly.
A correctly reset stone should feel solid.
If it rocks, lift it again and adjust the leveling layer.
Do not try to solve rocking by packing loose soil around the edges.
The support needs to come from underneath the stone.
Make Sure the Stones Drain Properly
Drainage is one of the biggest factors in long-term performance.
If water constantly moves through the path, even a properly installed base may eventually experience washout.
Check nearby:
Downspouts
Gutters
Drainage swales
Lawn grades
Retaining walls
Patio runoff
Irrigation heads
A downspout releasing water directly toward stepping stones may need an extension.
A low section of the path may need to be regraded.
Fixing the drainage problem usually costs less than repeatedly resetting the same stones.
Rochester Minnesota Climate Considerations
Rochester’s seasonal weather can be hard on hardscape features.
Spring
Snowmelt can saturate the soil.
Avoid major resetting work when the ground is excessively soft because the repaired base may settle once conditions dry.
Summer
Summer is generally an excellent repair season because the soil is easier to work and compact.
Fall
Early fall can also be a good time for repairs before the ground freezes.
Make sure drainage issues are corrected before winter.
Winter
Freeze-thaw cycles can expose weaknesses in poorly compacted bases.
A repair completed properly before winter is much more likely to stay level through the following spring.
How Much Does It Cost to Fix Sinking Stepping Stones in Rochester?
Pricing depends on:
Number of stones
Stone size and weight
Base condition
Drainage issues
Access
Whether stones need replacement
Amount of excavation
Labor required
Typical planning ranges may include:
Repair Type | Estimated Cost |
Reset 1–3 small stones | $250–$600+ |
Reset several stepping stones | $500–$1,200+ |
Rebuild small stepping-stone path | $1,000–$2,500+ |
Add compacted base and relevel path | $1,500–$4,000+ |
Drainage correction plus stone repair | $2,000–$6,000+ |
Professional landscaping labor may also be calculated by crew time. For more complex repairs involving excavation, hauling, grading, or equipment, total cost can rise quickly.
If stones are cracked or too thin for the application, replacement material adds to the budget.
Should You Replace or Reuse the Existing Stones?
If the stones are still structurally sound, they can often be reused.
Replacement may make more sense when stones are:
Cracked
Severely chipped
Too thin
Irregular enough to create trip hazards
Mismatched
Too small for the intended path
Reusing existing stones can reduce material costs while still producing a strong finished path if the base is rebuilt correctly.
Common Stepping-Stone Repair Mistakes
Avoid these common shortcuts:
Adding loose topsoil underneath
Skipping compaction
Using too much bedding sand
Ignoring drainage
Resetting stones too low
Resetting stones too high
Filling edge gaps instead of fixing the base
Repairing one stone when the entire path is settling
Working when the soil is saturated
A stable path starts below the visible stone.
Frequently Asked Questions
1. Why are my stepping stones sinking?
Poor base preparation, soil settlement, water runoff, clay soil, and freeze-thaw cycles are common causes.
2. Can I just add dirt under a sinking stepping stone?
It may work temporarily, but loose soil usually settles again. A compacted aggregate base is more reliable.
3. How much base should go under stepping stones?
Many repairs use approximately 2 to 4 inches of compacted aggregate, depending on the stone and soil conditions.
4. What is the best base material?
Crushed gravel, crushed limestone, or another compactable aggregate generally works well.
5. Should stepping stones be level with the grass?
Usually yes, especially if a mower will pass over them.
6. Why does the same stepping stone keep sinking?
There may be a drainage problem, unstable subsoil, or inadequate base underneath it.
7. Can sinking stepping stones be repaired in spring?
Yes, but wait until saturated soil has dried enough to compact properly.
8. Do stepping stones need sand underneath?
A thin leveling layer can help, but sand should sit on top of a compacted base rather than replace it.
9. Can existing stones be reused?
Yes. If the stones are in good condition, they can usually be reset on a rebuilt base.
10. How long should repaired stepping stones last?
A properly compacted base with good drainage can remain stable for many years, although Minnesota freeze-thaw cycles always create some long-term movement.
Contact Our Rochester Landscaping Team
Knowing how to fix sinking stepping stones in Rochester Minnesota means addressing the reason the stones moved in the first place.
A long-lasting repair usually requires removing unstable material, building a compacted aggregate base, correcting drainage where necessary, and resetting each stone at the proper elevation.
Our Rochester landscaping team provides stepping-stone repair, paver repair, grading, drainage correction, landscape-bed renovation, retaining-wall work, sod installation, hydroseeding, and other residential landscaping services throughout southeastern Minnesota.
Contact us today to request an estimate for resetting sinking stepping stones or improving your existing landscape path.


Comments